Sunday, February 28, 2016
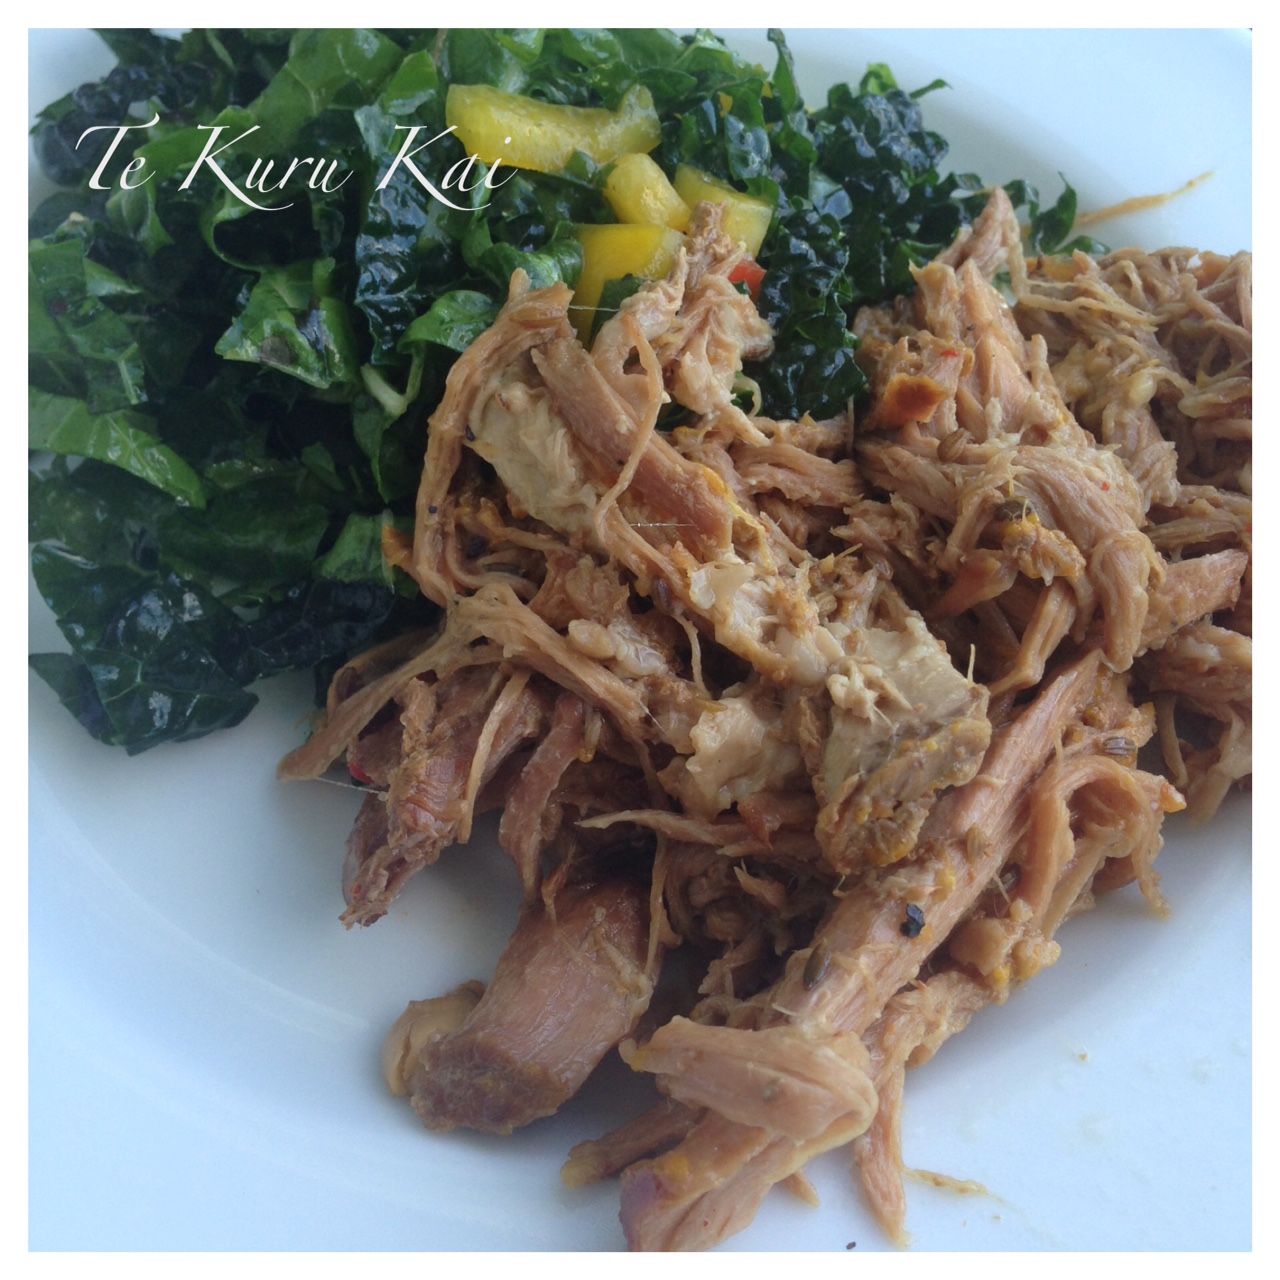
Orange & Fennel Pulled Pork
I made this a little while ago and it really is so easy to make. It melts in your mouth and jam packed with flavour. It is a perfect dish to prepare the night before, place into the crockpot the next morning and it's all ready to devour that night - not to mention the aroma that fills the house while it's cooking.
If you don't have a blender, then don't worry. Simply chop everything up and throw it all together. As long as the flavours get into the pork that's all that matters.
Ingredients
1.5 - 2 kg pork shoulder
2 tablespoons of fennel seeds
2 cups of fresh orange juice
1 red chilli - deseeded
2 cloves of garlic
1 knobs of ginger
Sea salt & cracked pepper
Method
Blend all the ingredients (except the pork) in a blender until everything is smooth.
Remove any skin from the pork and pierce as many times as possible. Place the pork into an oven dish OR crockpot and add the marinade making sure all those wonderful flavours get into the pork.
Cover and cook on 140 c for 6-8 hours until the pork begins to pull apart nicely. Alternatively you can place on low on the crockpot for 8 hours.
In the same dish, pull the meat apart with two forks then cover and leave warm until ready to serve.
Serves 8-10 people
Happy living peeps!!
Saturday, February 27, 2016
Hutch Makeover
I purchased a hutch dresser for $30 off trademe over 18 months ago with the view to give it a new life. At the time of purchase it needed some serious TLC as it had been stored at a diary farm shed for a number of years. It had a bad brown/orange 80's look which I really wasn't feeling, but it also had some interesting detail which I thought would be interesting.
Sadly it sat in our shed for 18 months before my husband and I gave it a good clean up. He repaired what needed doing, while I sorted the colour scheme. My choice being Annie Sloan duck egg blue for the outside of the dresser and Annie Sloan graphite for the inside of the shelves, drawers, cupboards and handles. I finished the graphite with dark wax, while the duck egg blue is finished with clear wax.
There was a bit of discussion whether to keep the doors on the upper part of the dresser, but we decided it would be better left off. What do you think?
| Inside the house |
I had originally thought of selling this piece, but as usual once it was finished we all fell in love with it inside the house.
Happy living peeps!!
Thursday, February 18, 2016
Pineapple & Avocado Salsa
I made this recipe years ago when I was experimenting. I wanted a nice refreshing side to go with some cajun fish and this was perfect! It's light, tasty, extremely refreshing and delicious.
Ingredients
2 cups diced pineapple
1 cup chopped coriander
1 avocado, diced
1 red chilli, seeded, finely chopped OR a pinch of chilli flakes
1 red capsium - diced
1/2 cup diced red onion
2 Tbsp. lime juice
Salt & pepper
Method
Place everything in a bowl and toss gently. Season with salt and pepper.
Serves 4
Happy living peeps!
Sunday, February 7, 2016
Home Grown Goodness
We are going on our 5th year since moving to the ponderosa and life just keeps getting better in terms of all our wonderful home grown goodness. In saying this, our home grown ventures haven't always been an easy road with a few trial and errors occurring.
Reflecting on some past blogs we didn't get any plants from PROPAGATING FROM THE GARDEN. Unfortunately I forgot to change the timer on the sprinkler within the greenhouse which proved disastrous!
THE OLIVE GROVE is still there, however a few of them were attacked by the local rabbits. They weren't eating the trees, but they were burrowing into their root system which made it difficult to get established but they are starting to get going now. Especially when we decided to get rid of the pine trees.
Trimming the chooks wings is a must or trying to grow a vegetable garden turns into a losing battle. There was a time there when our chook numbers were going to decline at a fast rate and keeping sheep inside a paddock can prove more challenging than we thought. They definitely aren't like beef, that's for sure!
With all the trials and errors, we have learnt from them to look to improve and learn from the experiences and the results are only getting better.
Happy living peeps!
Reflecting on some past blogs we didn't get any plants from PROPAGATING FROM THE GARDEN. Unfortunately I forgot to change the timer on the sprinkler within the greenhouse which proved disastrous!
THE OLIVE GROVE is still there, however a few of them were attacked by the local rabbits. They weren't eating the trees, but they were burrowing into their root system which made it difficult to get established but they are starting to get going now. Especially when we decided to get rid of the pine trees.
Trimming the chooks wings is a must or trying to grow a vegetable garden turns into a losing battle. There was a time there when our chook numbers were going to decline at a fast rate and keeping sheep inside a paddock can prove more challenging than we thought. They definitely aren't like beef, that's for sure!
With all the trials and errors, we have learnt from them to look to improve and learn from the experiences and the results are only getting better.
Happy living peeps!
Sunday, January 31, 2016
Chicken With White Wine & Bacon
Nigella has to be one of my favourite cooks, mainly because she's all about the flavour and less about the fancy stuff. My thoughts are, just get it done so you can sit down and enjoy the food with great company.
This is a prime example of one of her recipes that just so happened to pop up on my instagram feed. I looked it up online and it had 4 ingredients. Simple so based on all the great feedback I immediately thought I have got to try this.
As always, I didn't quite have what she asked in her recipe so I had to improvise. Her recipe calls for chicken schnitzel, which is simply chicken breasts flattened but I much prefer the boneless thigh because it has so much more flavour. I also didn't have any garlic infused olive oil so my recipe has 5 ingredients as opposed to her 4.
Ingredients
1 tablespoon of olive oil
2 cloves of garlic - thinly sliced
4 rashes of streaky bacon - thinly sliced
4 boneless chicken thighs
100 mlx of white wine
Method
Add the olive oil to a pan then throw in your sliced bacon and garlic. Cook until the bacon is nice and crisp, then take out of the pan and set aside leaving as much of the pan juices in the pan.
Making sure the pan is hot, throw in your chicken thighs and cook until the juices run clear. Make sure you turn so that both sides are nice and golden. Take the chicken out of the pan and place on a serving platter.
Place the pan back on the heat and add the wine and bacon making sure to deglaze the pan with all the goodness from the bottom of the pan. Pour everything over the the chicken and serve immediately.
Serves 4
Happy loving peeps!
Saturday, January 30, 2016
Vintage Bench Seat Gets A Makeover
I tend to write in my blogs about how I collect things .. which usually happens when I "cleanse" and then collect more things. This stool is a great example of how my husband and I went to the local dump to get rid of some rubbish .. and during the trip I spotted this little gem for $5.
As you can imagine, there were many ideas of how this piece could be completed. Painted with a neutral colour or colours such as pure white with paris grey. Or go bold with the colours using something like florence. Or upholster the top instead of painting it. Or have a shabby chic finish or not.
I decided I wanted something to make a statement and be more like a piece of art as opposed to a piece that blends into the house. I decided on a harlequin design using Annie Sloan pure white and graphite.
I am pretty happy with the final result and right now I'm happy to look to display a few pieces on it. If you have an old piece like this, or a piece of furniture that needs a little "lift in life", then paint it!!
Happy living peeps!
| Before ... Really was in good condition |
I decided I wanted something to make a statement and be more like a piece of art as opposed to a piece that blends into the house. I decided on a harlequin design using Annie Sloan pure white and graphite.
| First coat of the design. Gig help do the taping :-) |
| Pattern Finished |
| The finished product |
Happy living peeps!
Thursday, January 28, 2016
My Treasured Terrarium
Off we went to the local k-mart and $2 store to pick up a couple of glass vases, to showcase them in. A few miniature cacti from bunnings and some succulents from my garden, some stones (both new and those that I bought back from Wanaka), soil, dried moss and some small pieces of drift wood from Wanaka which I blogged all about in DIY DRIFT WOOD. We were all set to go.
| This is mine that I completed. |
I started with my stones from lake wanaka to ensure my plants don't have wet roots. I followed with a layer of dried moss, succulent mix, then my plants. Finally I finished with a few pieces of drift wood.
| Jayden's finished product |
| Jayden enjoyed making them so much, she made one to sit on our dining table using my trifle bowl & a small one using an old jar |
| 3 of them now sit on Jayden's drawer in her room |
Happy learning peeps!!
Monday, January 25, 2016
DIY Drift Wood Art
Back in November 2014 we took a trip to the south island visiting Queenstown and Wanaka which was just wonderful. We sat on the shores of Lake Wanaka to take in the beauty it had to offer. During that time, Jayden and I collected some drift wood that had washed ashore along with some stones and decided to bring them back home. "What are you going to do with that" Aaliyah said to me. "hmmm ... I'll think of something" I thought.
Just over 12 months later and Aaliyah's question is answered!!
It was pretty easy to make. I simply drilled a hole in each piece and threaded some craft string through making sure to knot it on both ends. I also made sure there was enough string to hang the piece. A quick rotate of each piece of wood to give it balance ... and it's done.
It was a quick fix decor idea for my verandah .. and who knows, I might end up pulling it apart at some stage and making something else.
Happy living peeps!
Sunday, January 24, 2016
Buttered Spinach & Herb Potatoes
I do a little bit of work for my marae and after serving some herbed potatoes for an event late last year, I decided to change that recipe up a bit over the xmas period and invent this variation for my whanau.
It's quick, easy and very tasty! If you are not a fan of butter, then replace with some olive oil or avocado oil but please DO NOT use margarine.
Ingredients
10-12 baby or gourmet potatoes - halved if necessary
1 cup fresh Spinach - finely chopped
1/4 cup of fresh italian Parsley
Pinch of chilli flakes
Fresh ground pepper
Sea salt
50 grams of butter - cubed
Method
Boil the potatoes in salted water until cooked and turn off the element. Drain the water, then replace the lid on the pot and place back on the element for about 2-5 minutes until most of the liquid is evaporated from the potatoes, watching they don't catch.
Place the potatoes in a serving bowl, then throw in the spinach, parsley, butter and chilli flakes. Toss quickly until butter is melted, then season with salt and pepper to your liking.
Serve and enjoy!
Serves 4.
Happy living peeps!
Subscribe to:
Posts (Atom)