
Jayden spent a bit of time pinning the headboards she liked on pinterest and after months of trolling through trade me and second hand stores I decided to make one. (with the help of my wonderful husband and Jayden of course).

Once Jayden picked what size bed she wanted and selected a beautiful linen fabric, then we were all good to go. Gig measured out a piece of plywood and rounded the edges with a router.


Next was the buttons. The local spotlight sells upholstery buttons that you can cover and we needed 33 in total. A little tip - these buttons don't work as well with thick fabric (like we had), so we also used some hot glue for that extra stick.

Now for the fun part! Or that's what we thought anyway. I started from the middle and working outwards, I threaded the button from the front through each hole to the back of the headboard. As I pushed the buttons to the plywood, my husband secured the button thread at the back of the headboard with 3 staples. Big tip - try not to pull the material too tight to allow for the pleats to fold and form the diamond pattern. Repeat until all buttons are completed, working the tufting and secure the fabric to the back of the board.

Gig then cut a few pieces of plywood for the headboard legs and routered the join to fit where the headboard will screw onto the bed itself. We secured them with my brand new staple gun. We then cut up some old foam and placed them over the bed legs so the headboard doesn't damage the internal walls, then covered the whole back with an old ripped sheet we had.

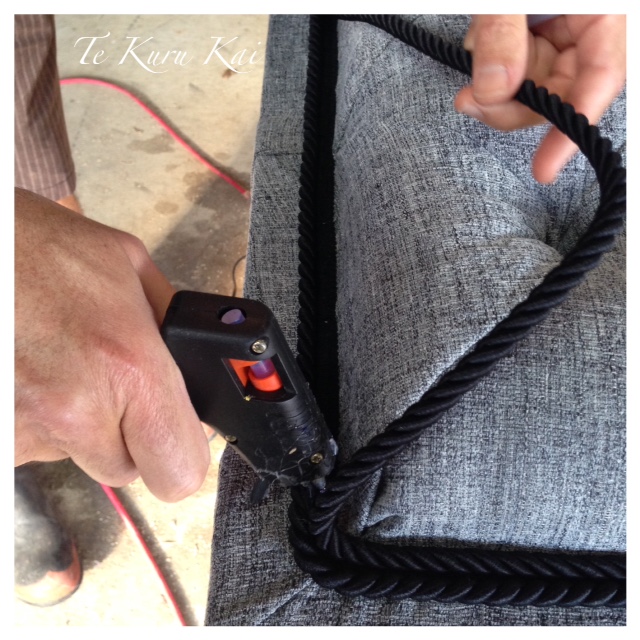
Once the headboard was fully covered, the idea was to edge it with some upholstery tacks, but it was so big that the tacks looked lost. Solution, upholstery cord!! The first one was stapled in place, then the second was placed inside it and secured with hot glue.

The finished product!
If I am honest, it was a challenge to complete and you definitely need at least two people to do the actual tufting. If you have a gang of 3 people doing the buttons, it really helps as well because that alone was a challenge for one person.
The finished photo doesn't really give the headboard justice but I am so happy we finished it and that it looks fabulous in Jayden's room. Best of all, Jayden loves it too!!
Happy learning peeps!

No comments:
Post a Comment