I haven't posted any pictures of cakes lately. To be honest, I did not have an opportunity to make many in 2016 due to my study, but I am pretty happy with what I was able to capture.
I
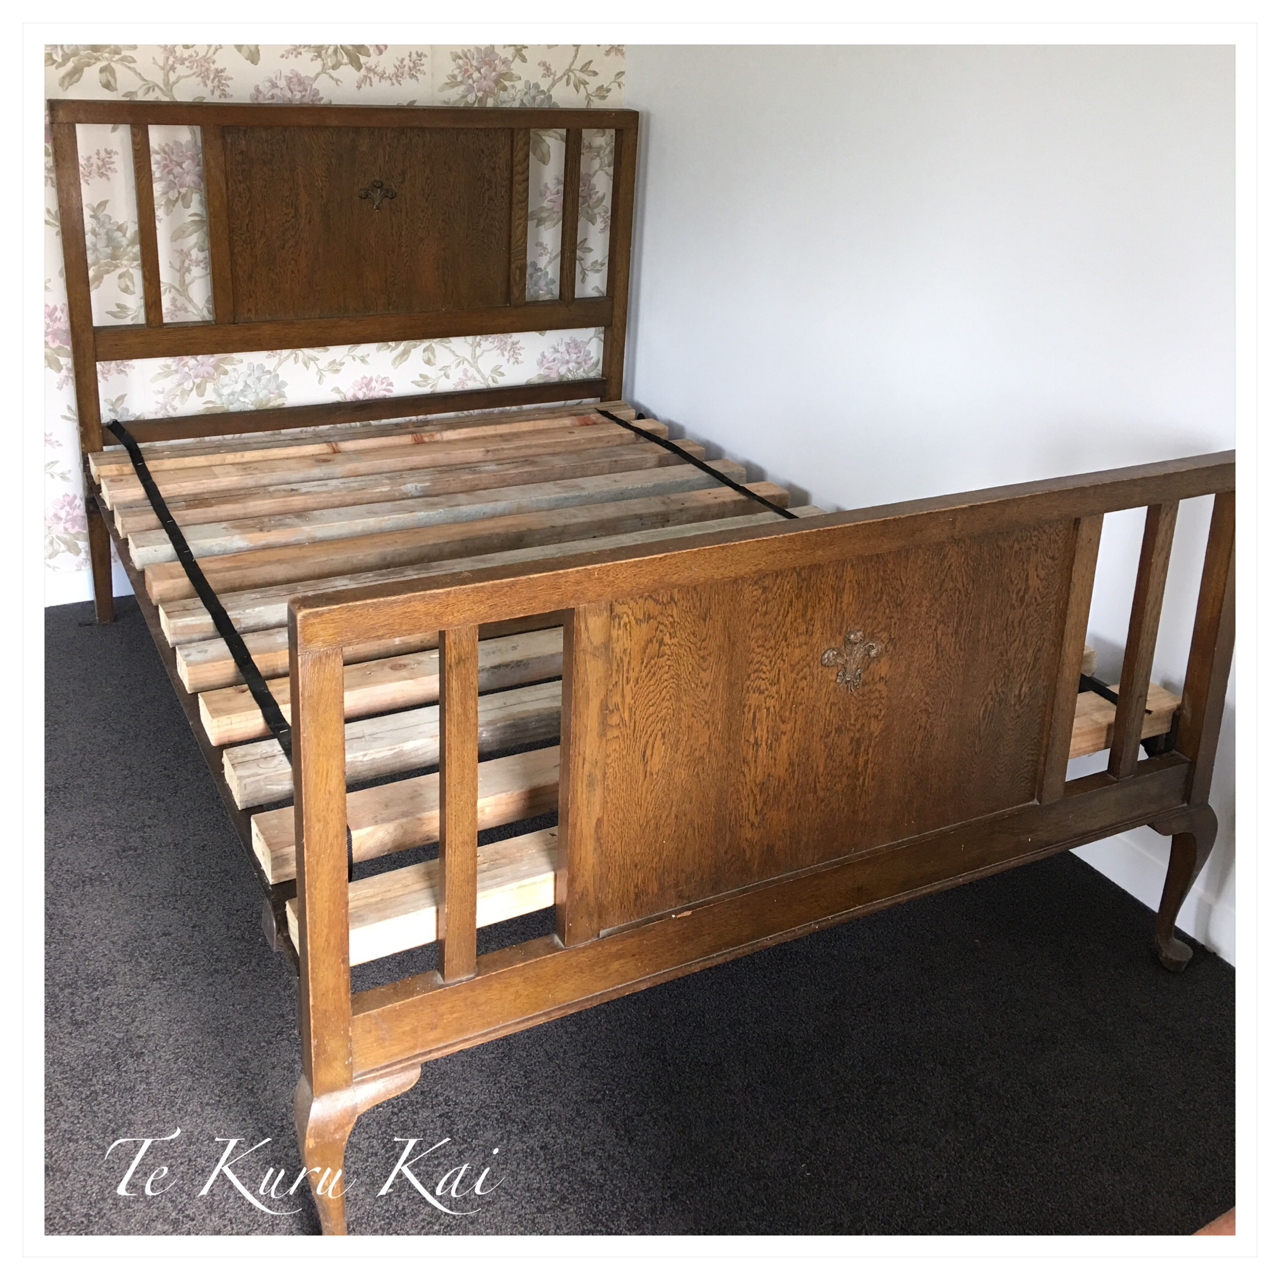
inherited my grandparents’ lovely Queen Anne oak double bed frame. It had
sat in my Nan’s shed in Raglan for years without a bed base or mattress.
I asked my husband to create a wooden frame to hold the weight of a mattress
and two people and in return Gig produced a slate base using some old wood and
building strapping .. thingee, watchacallit. It was perfect!
The bed found its place in our spare room at Wiltshire, then it became Aaliyah's bed when we moved to the Ponderosa. When we renovating Aaliyahs room (AALIYAH'S ROOM REVEALED), the bed went into our shed until we finished renovating the outhouse. I loved the bedhead the way it was, but decided to rejuvenate it by giving a splash of paint. Colour of choice ASCP Antoinette with white wax.
Before
First Coat of Paint
Finished product!
The bed now serves as a daybed in the outhouse and I just love the finished product. Whenever I see this bed, I reflect on it's history and stories from the past and of the different families it has been apart of.
As a side note, I need to work on my dressing skills for my photos. In my head I can hear my cousin Marian reviewing me and I ampositive she would have a lot of say about improvement.
It has been a while since I blogged about the animals on the Ponderosa. Our chickens have been going great guns with eggs, although now the season has become cooler, production has reduced. We lost a few brown shavers over the season which is normal and we did not hatch any eggs over the summer which means we need to look at purchasing some pullets to bring up our numbers again. We just have to figure out what breed. Although the brown shavers are great egg producers, they are not very good eating so a little research is in need.
We did not have the greatest of seasons with our beef particularly after blogging how well our beef have been over previous seasons in FAREWELL TO OUR CALVES - PART 2. We lost three bull calves at birth, two of which were twins then 6 months later we lost a heifer calf to bloat. Given we had reduced our heifers from 8 to 5, we were down to only one calf for the season because we were convinced the remaining heifer was not going to calf. Miraculously prior to Christmas, a bull calf was born. If I am honest, I was devastated and worried that we had done something terribly wrong and that it would impact into this seasons calving. Imagine my delight when the first of this season's calves were born and seeing the calf move as I was heading to check that it was alive. Then being overjoyed to find a second calf had just been born to another heifer within minutes of me checking the first calf. Two calves on the same day!! Within three weeks, our third calf was born. Bullet the bull has been busy! Although we are still awaiting the results of the final two heifers. As this season's calves have started, we have since sold the two calves from last season. The price per head of beef is pretty good!
Our calf that came just before xmas
The sheep are doing fantastic! After blogging about them in LAMBS ARE OUR NEXT VENTURE, we have acquired two more sheep. Another ewe named Shawshank and a ram named Rollroaston. Both of the new additions are wiltshire sheep, which means they self-shed their wool, are resistance to diseases and are prone to having twins or triplets. The "sheepeez", are nicely pregnant and it's fair to say that I am very nervous about when they lamb. Firstly, because we've never dealt with lambing before, and secondly because we've never had to deal with sheep having more than one lamb at a time. Within the next few months, it'll hit us like a tonne of bricks. We will have anything from two lambs to six lambs or possibly more. Eeeek! The plan for these lambs is to put them in the freezer, but you never know what else might come of it.
The view from the chook run
We have also acquire two more fox terriers. Lexi and Sloan (I'm sure those that are into Greys Anatomy will get it). They are such great companions for my husband while I'm away with study and have just learnt how to catch rabbits, mice and rats. They are not too keen on the stray cat that comes around yet ... BUT it will only be a matter of time.
Lexi is on the left with her sister
Sloan
As a side note, we were offered a couple of kunekune pigs last week. Under any other circumstance, we would've taken them in a heartbeat. Unfortunately, we had to say no. Pigs are on the cards for the Ponderosa, however not just yet. Happy living peeps!
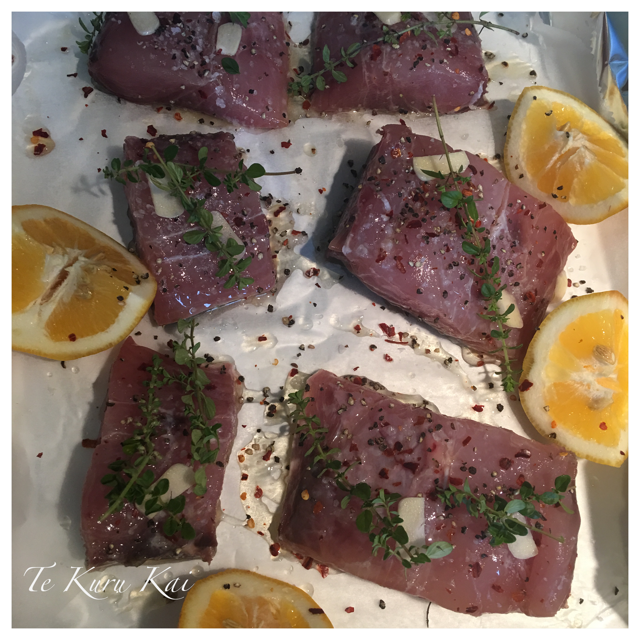
A good friend of ours gave some beautiful fillets of kingfish after a day out on the boat in Raglan. I love kingfish and decided to give this new recipe a go.
Ingredients 500 - 750 grams of filled kingfish 2 x garlic cloves, peeled and thinly sliced 1 x lemon Some fresh thyme Cracked pepper Sea salt Chilli Flakes Splash of Olive Oil Method Preheat the oven to 200°C.
Cut the fillets into serving pieces and give them a thincoating of olive oil. Place them into a lined baking tray, skin down, then sprinkle with lemon juice, salt, pepper, garlic slices and chilli flakes.
Bake uncovered in the oven for approximately 15-20 minutes or until cooked.
Serve with a beautiful green salad with watercress, baby spinach and kale, and a mild vinaigrette dressing.
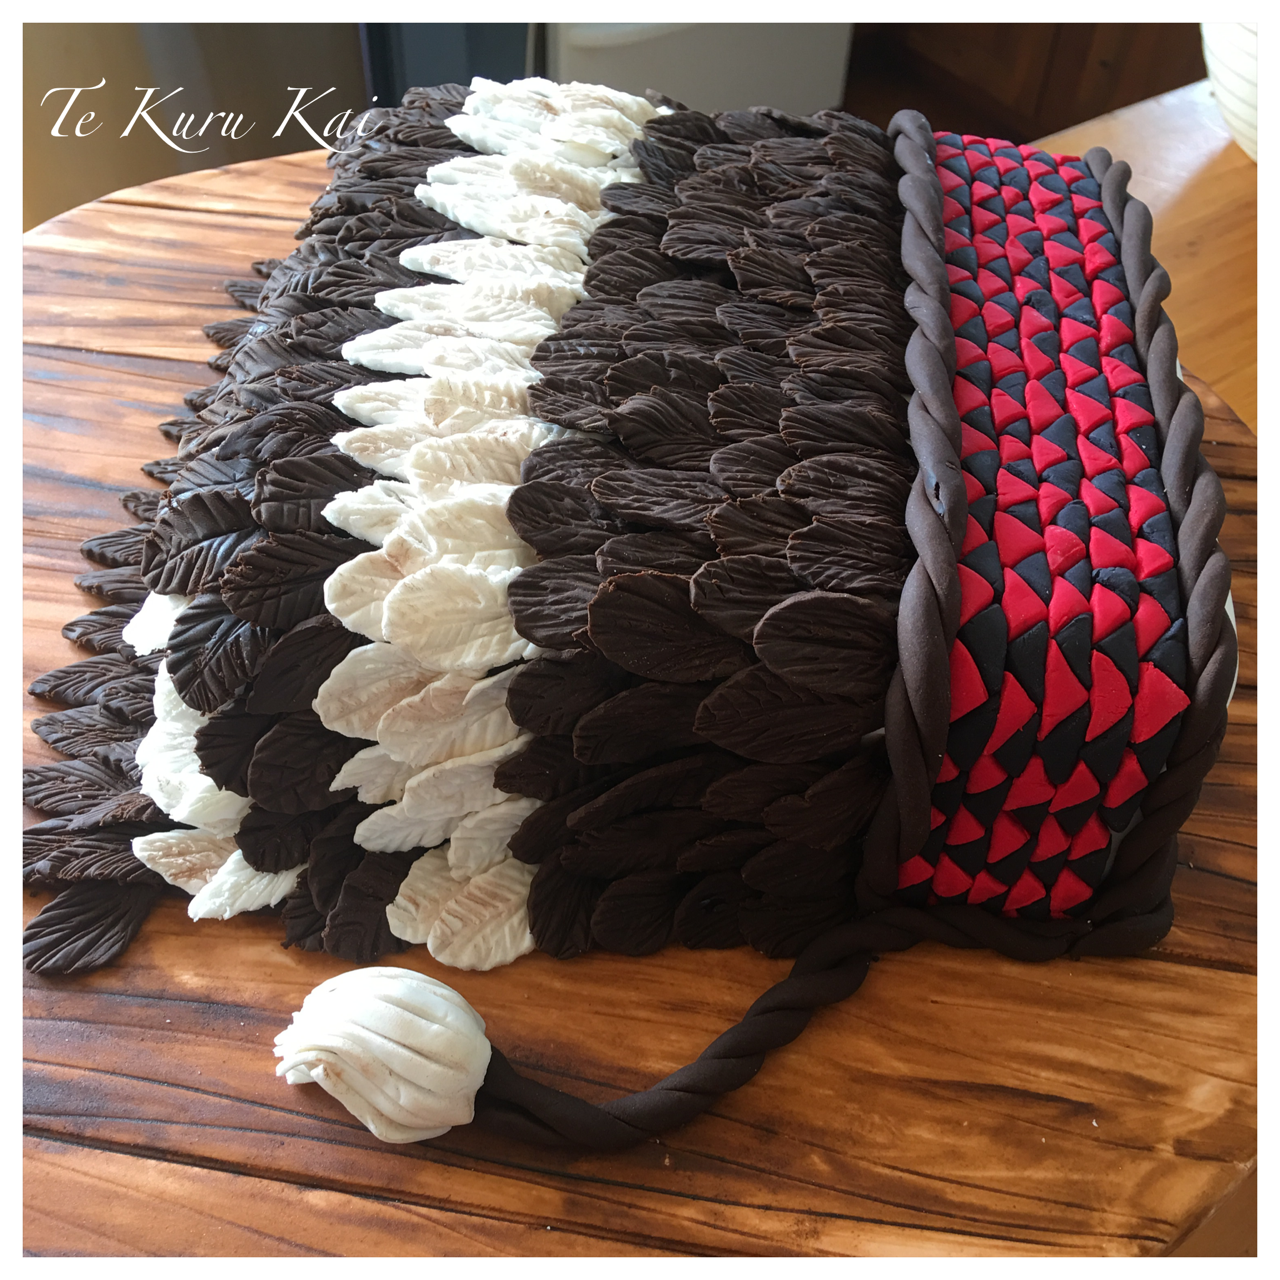
I was asked last year to make a cake by a whanau member for their baby. Unfortunately I was unable to accommodate due to my study, but when the tono came through for this year I was more than happy to oblige. The brief was a Moana cake with buttercream.
As always, I am keen for a challenge and decided to do something extra special!
The board was massive measuring 600 mm x 600 mm. The sea, land and flowers were made with fondant, while the sand and texture of the cake was made with biscuit crumb ... and a whole lot of buttercream.
I was so excited with the project and extremely happy with the final result.
I've been asked by a few people about the decorations that we used for my daughters 21st birthday last year; in particular the 21 sign. To be honest, the final design was nothing like the original brief that the girls wanted.
When I sat down with them to go over their plans, the first option was a feature wall totally covered with fresh white flowers. Hmmm, unfortunately this did not fit within the budget, so they needed to be more creative in their ideas. The second option presented was a feature wall totally covered with fresh hydrangeas. I was pretty impressed with their case, considering the plan was to pick the hydrangeas roadside because they are everywhere on the side of the road were we live. Unfortunately the birthday was in the middle of winter so hydrangeas via roadside was not an option. The third option was artificial flowers, store brought ready to glue onto the feature wall. Turned out, this was a more expensive option than having fresh brought flowers. The fourth and final option was to create their own artificial flowers. A much cheaper but more importantly, a more creative option. Now to find the materials. When we cleaned out the shed to make room for the party, we found an old sheet of chipboard and a piece of polystyrene which the girls used as the base and cut out the numbers.
With the help of their father, the numbers were secured to the boards, however not fully flush to the board because they wanted fairy lights behind the piece.
Now for the flowers. A quick search on pinterest was needed and they found an easy way of making the flowers using large commercial coffee filters, hot glue and existing paint that was watered down.
The instructions said to fold the filters into quarters and cut into shape, but the girls simply played around with them until they got the look they were after using approximately 6 filters per flower, then twisting the bottom of each flower to keep it all together.
The instructions also showed the girls how to dye to flowers prior to forming the shape, however the girls improvised, dabbing watered down paint onto the edges of the flowers. As the filters absorb easily, there was very little paint needed.
The flowers then needed time to dry, which gave us time to give the chipboard a quick coat of black paint.
Then it was time to glue them onto the numbers and add the fairy lights.
I have very impressed with the final product, and the effort the girls put in to making a creative, affordable option that went so well with all the other decorations for the party.
I make no secret that I am a fan of Nigella and her no fuss way of cooking. When I had a chicken in the fridge and wanted to try something different that required very little effort, I gave my spin on her slow roasted garlic and lemon chicken a go.
It really does take a matter of minutes to prepare, and then you let the oven do the rest of the work. The intense lemon flavour is amazing although try to use unwaxed lemons so the flavour isn't too tart.
You may want to serve it with some mashed potatoes or kumara to soak up all those lovely juices although I simply served it with a beautiful green leafy salad, using the juices as a dressing. If you don't have a whole chicken, then simply use chicken pieces.
Ingredients 1 x whole chicken cut into 10 pieces Unpeeled garlic cloves from 1 large head of garlic 2 lemons roughly cut Some fresh thyme Enough Olive Oil to coat 1/2 - 2/3 cup of white wine (extras you can drink while you wait) Black pepper
Method Preheat the oven to 160°C. Place the first 5 ingredients into a roasted dish and toss until the chicken is nicely coated. Sprinkle over the white wine followed by the black pepper, then cover tightly with foil and place into the oven for approximately 2 hours. Remove the foil, increase the heat to 200°C and cook uncovered for a further 20-30 minutes. Keep an eye on the chicken at this stage as the smaller pieces of chicken can dry out. Serve and devour!