Sunday, April 29, 2012

Are You Nuts!!!!

I've always wanted to have nut trees, but I've always been put off  by people saying they can take anywhere from 3 to 10 years to produce their fruit ... or should I say nuts.  Although there is a 3 to 10 years statement in there somewhere, I usually focus on the 10 years, think that's crazy, then completely tune right out of the idea, until of course I'm at the local supermarket and see how much I have to pay for my walnuts, hazelnuts and almonds for my homemade granola.  It's then, that I remember my idea of wanting my own nut trees and hear the 10 years again and again ... and again.

You can only imagine how excited I was when roaming the Ponderosa with the old owners just prior to moving in, when I spotted the walnut tree.  In fact I was that excited I think I screamed "IS THAT A WALNUT TREE?  Julie (the past owner) said "oh yes, that's a walnut tree and has produced a lovely crop for us every year".  And on that reply I proceeded to talk about how I've always wanted to have my own nut trees and how excited I was that I don't have to wait for the dreaded 10 years, bla, bla, bla, bla, bla, bla, bla!!!

Fair to say Julie was a little puzzled by my dribble drabble and there was a small silence before she proceeded to say "well if that makes you happy, you'll be pleased to know on the other side of this paddock is a line of hazelnut trees".  To cut a very long story short I nearly pee'd my pants at hearing those words :-)

I was told that hazelnut and walnut trees can be harvested in autumn so out came my handy dandy scriptures "The Tui NZ Fruit Garden" book to confirm this.  Late summer to early autumn was the timing for the hazelnuts it said, so off I went with my husband one afternoon in late March (early autumn) to gauge how the nuts were developing, both without any understanding of what to expect.  My excitement turned to disappointment very quickly when I learnt that we were too late.  The row of hazelnut trees had already produced their crop and the wild critters of the land had feasted on the lot :-( .. "Oh well" said my husband, "we will need to take note for next year and come over the check on a regular basis".  "Grrrrr!!!!", he was right, but the thought of me having to shop at the supermarket for the next 12 months for my hazelnuts was a little hard to swallow.

The walnut tree is much closer to the homestead and is grown with one side in the paddock and the other in the home garden. I was determined to ensure we had some type of harvest off this tree.  Mid to late autumn was the harvesting timing from the "Tui Scriptures" and when one nut drops, all nuts should be harvested. So one day when I had finished taking cuttings from my camellias, roses and lavender plants, and during a visit from my parents we sat under the walnut tree discussing life's stories over a nice cup of tea when my mother (who just so happens to LOVE LOVE LOVE nuts) said "you're walnuts can be harvested, they have fallen off the tree".  With that note, my husband picked up the nuts that had fallen into the garden side, I peeled them ... and my mother attempted to crack some open to have a taste.  They tasted delicious!!! (even when my mother has no talent what so ever in ensuring the nut comes out whole).  Once we had finished that lot of nuts, we concluded they needed to be dried out before shelling them further.  We still needed to pick up the nuts from the other side of the tree (paddock side) and I thought, I'll get that done tomorrow as daylight was drawing to a close.

I went to bed happy that we had harvested some of our walnuts and wondered how many nuts we would need to harvest the next day.  I awoke the next morning discussing the harvest with my husband as we prepared our breakfast.  On a nice sunny morning, we take our breakfast out onto the verandah that overlooks our paddocks and you can see the walnut tree as well.  The sun is always welcoming and I could sit and watch the view for hours as it's quite relaxing and therapeutic.  On this particular sunny morning however, we discovered the neighbouring farmer had placed his cows in our paddock early that morning and the cows were eating all the walnuts on the ground :-(

I was gutted!!!  Gutted that we weren't able to gauge the full crop from the walnut tree, but happy that we had at least harvested some nuts the day prior.  

Learning's from this experience?  We need to ensure that the cows and critters don't get next years crop.

Our hazelnut trees

Our walnut tree - paddock side

Our walnut tree, ... garden side

Some our our harvest from the walnut tree
Have a great day!!!


Monday, April 23, 2012

If At First You Don't Succeed, Try And Try Again

It's common sense isn't it?  I mean we are bought into this world to take risks and test ourselves on our own abilities in life.  That's how we learn, how we progress isn't it?  Maybe so, or maybe it's the fact it's nearly midnight and I thinking to myself as I type this, that it's a little too deep for this time of the night.


Yes ... so .... I wanted to share with you my latest creations I decided to test over the past week.  The first is what I call my Retro Rose Cake.  I saw something similar on a blog I Am Baker and thought I'd give it go. Unfortunately the frosting was too wet and because my visitors were arriving within 15 mins of me finishing it, I had to improvise with black in white sprinkles :-(  In saying this, I love how the colour came out but I have learnt from this mistake and will ensure next time it comes out PERFECT!!!!

A work in progress for sure ... I call it my Retro Rose Cake

My second creation is a Chocolate Ruffle Cake which was a lot more successful than the Retro Rose Cake.  I made this for Sharianne Rangitaawa's 20th birthday.  It was a surprise from her mother Dora.


I decided to try a new frosting recipe I found on a blog called Let Them Eat Cake!!  The recipe was so quick and easy I was really amazed with the results.  In fact, the recipe called for Dutch Cocoa to not only give it a rich flavour, but the dark chocolate colour too.  Unfortunately I used the last of the dutch cocoa in the cake itself, so I decided to use my budget out of the box cocoa instead .. end result ... colour was brilliant .. flavour was awesome!!!!


I have tried the ruffled effect before on a couple of other cakes, so I knew what to expect.  What surprised me was just how beautiful the finished product was.  


Unfortunately I need to work on my photography skills because this is the best photo I got before it was taken away to be devoured by Dora, Sharianne and the rest of the whanau.  Learning from this cake ... get better photo's :-)


Have a great night!!


The Olive Grove

Olive Grove - A small group of olive trees.

The past week has been hectic for me and my whanau therefore many jobs are needed to be completed around the Ponderosa - one of which is planting the olive grove.  

I was gifted an olive tree as a house warming present from our good friends Viv and Kev and I knew that one plant would be the beginning of the olive grove.  The olive type they gave was 'ASCOLANO' and the standard tag that came with it from mitre 10 stated it was a reliable heavy cropper that produces a good table olive with a delicate flavour.  Great I thought, I just need to find the right place for it because I knew my husband would be reminding me constantly that I need to find a home for it.

I took the placement of this tree seriously, therefore after a few weeks I decided that I wanted the tree to go in the back paddock by the chook coop.   Mainly so that it didn't impede on any of our views, had easy access to cultivate the crop, plus provide some shelter for "the gals".  The soil is pretty good there with the exception of the pine trees being thirsty.

After studying my trusty book "Tui - The NZ Fruit Garden" (which my beautiful mother gave when I moved into the Ponderosa) it stated olive trees will tolerate the most unfavourable conditions including prevailing winds, but needed good drainage so I thought, yip ... by the chook coop it is.  I just need a few more trees to accompany this lone tree.

So off to mitre 10 we went to get a few more trees.  5 more in fact - another two ASCOLANO, 1 x FRANTOIO, 1 X PENDOLINO and 1 x LECCINO.  We chose the other types because the mighty tag stated they were good cropping trees for making oil and if planted together would produce better.  I am a little sceptical about these tags, but it's a learning exercise that only time will tell I suppose ... and I'm sure I'll learn a lot from.

After a number of weeks contemplating where to establish the olive grove and numerous glasses of red wine I am very happy with the end result. I can visualise the trees providing nice structure once they are established.

I've always wanted to plant olive trees, ultimately to make olive oil, however I haven't had the land to bring this want into fruition.....UNTIL NOW :-)  Thanks Viv and Kev for the inspiration to kick start the olive grove.

My husband and our beloved dog PAL finishing planting the trees


The gifted tree ... with our cheeky dog JOSEPH in the background
Our Olive Grove .... Small, but with big plans!!!!

Have a great day!!


Saturday, April 14, 2012

My Homemade Limoncello


This week I decided to bottle my two batches of limoncello that have been brewing for at least 6 months.  Yes that's right - 6 months, and between me and you, I am very excited about it!!  Why, because the alcohol that I have used was gifted to me by two different set of very good friends.  The first is from Rewa and Pia Harre and is brewed from grape skins and the second is from Bung and Ness Williams from Auckland, although the brew actually came from Bung's brother in Canterbury using a special recipe.

I haven't really been this excited about bottling a batch since I was asked by Bung and Ness to make a special batch for their beautiful wedding at Mantells.  Just quietly though, I was more nervous than excited after Ness told me they were going to hand out a glass to everyone at the end of the night as the last toast and the reality hit that everyone was going to have glass. Eeekkk, what if it didn't turn out right!!!  

I believe everything you enjoy doing should be done with love, so the results turn into a positive outcome.  Fair to say, I put a lot of love into that batch and I was so pleased hearing the wonderful comments at the wedding once the final toast was made.

Limoncello was my very first liqueur that I decided to try out.  The idea initially started when I was watching a travelling program which involved Italy and it stated that Limoncello was very simple to make. All you need is lemons, alcohol (the higher percentage the better - the program stated 80% alcohol) and sugar syrup and time to wait for the two step brewing process to get the finished product.  Of course I thought wouldn’t it be great to make and give out to all my friends as a xmas gift.  

They were definitely right. It was simple to make but the brewing took some time to get the right results but well worth the wait with all my friends giving me rave reviews.  Of course it’s not easy to get 80% alcohol in New Zealand unless you find someone who brews their own, so my first couple of batches were made with good quality vodka (which wasn’t too bad considering it diluted the alcohol content which resulted in a lot more happier people in the morning).

The longer you brew the liqueur the better the taste so if you’re pressed for time, this recipe isn’t for you I’m afraid, but trust me when I say it’s all well worth the wait.  There is one recipe out there though which my good friend Viv makes which takes a day or so to brew and I believe less than a day to for her and her wonderful husband Kev to drink :-)

If you don’t like a sweet liqueur then simply add less sugar syrup to the recipe and it MUST be stored in the freezer.  Don't worry though, this is where the high alcohol content ensures the liquid doesn't freeze, it only keeps it chilled for ready use.

Since my first batch and my first lot of Xmas gifts to my friends and family, I have continued to make this wonderful liqueur and I hear it doesn't last very long at all once it's given out.  

So here's the finished product :-)  plus what each step looks like.  I started a new batch on the weekend so you can see the difference in colour as the brew is allowed to do it's thing after time.

Lemon Skins Brewing - This is my new batch I started this weekend

After the Sugar Syrup has had time to brew - Time to filter and bottle.
Filtering process - I use coffee filters
Finished Product plus new brew - Bottles on right are using spirits from Bung and Ness, while middle bottles are from Rewa and Pia.


The idea of a nice glass of chilled limoncello on a summers evening or as a after dinner treat with some good company really appeals to me.  In fact that's exactly what we did last night.  Simply delicious!!!

Have a great day


Thursday, April 12, 2012

Food - The Essence Of Life

Baking is something I have grown up with all my life.  In fact food itself has always been an important part of our family life, not because you need it to survive, but more the fact that it  brings people together, creates happiness and laughter, strengthens relationships or simply produces treasured memories. 


Reflecting back, I have great memories of regular Sunday lunches at my grandparents in Ngaruawahia.  With life being so busy during the week my grandfather made a special effort to ensure he brought together all of his family to share in the weeks adventures over a roast lunch. As a child, it wasn't just my grandfathers cooking I looked forward to (although he loved his cooking and made the best chowder in the world), but more about seeing my cousins once again to play another friendly game of league on the front lawn or whatever else we had planned to do that afternoon and see what eventuated from there.


Although those memories were created with a Sunday roast, I have many more over a simple plate of mince that my aunty used to be renown for.  Yip there was no one in the world who could whip up a pot of mince like my Aunty Raina and feed the millions who used to visit her and her whanau when they lived in Ngaruawahia.  Her house used to have a huge front lawn and as a child I would play for hours with my cousins.


As the family grew, everyone got older, my whanau continued to have regular dinners or lunch's where we all came together to share a meal and discuss the affairs of the world. It continued, even when parts of the family ventured to Australia to build a better life for themselves or when the older passed away.  Those get togethers have remained strong, and an integral part of my whanau.  In fact, just in the past week there have been 3 instances that occurred, whether it be planned or unplanned, a huge crowd or just a few people and all went away happy.


I have to be honest though, there is nothing in the world that beats the sound of children playing and people laughing.  It's that very reaction that I treasure.  That I love.  Knowing that although the stresses of life may be strong for some, for that moment, that event, those stresses are forgotten and people are happy.


Anyway, back to baking which was my original idea and although my latest creation was for a good friend Dora Lester - actually, that's a lie, it's for Dora's children as a gift to their father this weekend. Anyway I felt compelled to sway off the beaten track slightly.  I mean baking is food and there are many instances where I have baked a cake for one of the many get togethers.  


As a child, baking was my introduction to cooking and the very first thing I made was a chocolate cake.  Well, the One Egg Chocolate Sponge from the Edmonds Cookbook to be exact.  I was 7 when I first attempted that recipe and it has stayed with me all this time.  I do make it every now and again, however my regular chocolate cake comes from an old secret recipe that was passed onto me from my aunty.  Although she has passed away now, she used to make this cake in a 20cm size and freeze loads of it down for when we would visit or needed her chocolate cake fix.  My sister Tanya used to be addicted to this cake, so it wasn't a surprise if we would call into Tanya's for a visit and out would come a perfect chocolate cake with ganache dripping from it's top.


Dora's cake is my aunties chocolate cake recipe with cream cheese frosting and chocolate waves.  The picture really doesn't give it justice at all, and I really must invest in a camera of my own.  I'm sure my husband is getting slightly annoyed that I keep asking to use is iphone.


This cake is huge (13 inches x 4 inches) so there is a bit of work that went into it. So baking the cake on Wednesday night, then filling the 4 layers with the same cream cheese frosting the next morning.  In fact I started at 5.45 am yesterday morning for the filling and frosting and had to do a little karakia to ensure I had all the frosting ingredients.... eeeek!!.  Luckily I did and I'm happy with the finished result and I know Dora and her children were happy with it too :-)


Next week I'm doing another cake for the same family so thinking of that design will be an adventure for me this weekend.


Have a great day!!


Wednesday, April 11, 2012

Good Ole Agee Jars


There are two things that I am crazy about at the moment.  The first is Crown Lynn (thanks Ness) and the other is agee jars.  What’s agee jars for those not from New Zealand?  They are NZ’s equivalent to Mason Jars and I have loads … although I’m not sure I have quite as many as my good friend Ness.

Agee jars are vintage now a days, but I remember as a child being surrounded by them when mum or my aunty was preserving and helping them peel peaches with the old school peeler that was attached to the old table.  I’m sure most of the peaches didn’t’ make it into the pot as mum always used golden queen peaches - the best peaches in the world.  The smell of them simmering in the pot, pouring them into the sterilised agee jars, then sealing them with their screw lids and putting them in the cupboard for a rainy day.  They were good memories as a child and I’d like to think I have learnt from those experiences in preserving. I love to preserve but can’t find myself to give away my agee jars with my preserves so tend to make batches in a variety of old jars.  The agee jars stay with me, and the older jars go out to friends and family. 

Anyway back to the jars.  Yip they are vintage now a days, but were a dim a dozen so long ago.  Funny how you take things for granted when you are young and then when you get older see an art in something old and it's because of this that I started to collect them as time went on.  


Of course not all people understood my passion for these jars.  When I lived in Wiltshire, my sister Deanne was disgusted at all these jars I had collected and couldn’t see the need for them all.  “Do you really need all these jars?” she would say to me and in reply I would smile and say “Yes Deanne I do”.  "Yes but do you need all these different size jars?" she would add.  "Yes Deanne, I do"  I would reply.  One thing you must understand about my sister Deanne is that she likes the “minimalist look” therefore she likes to defrag and loathes clutter so when she sold her house and her and her whanau moved in with us, it took some adjusting, but that's topic for another blog.

Now I’m living at the Ponderosa, my agee jars are right at home in the old villa and some of the uses I have found for them is a must when you live in a house that has little to no storage - but I'm not complaining.  I’m all for recycling or using what you already have, so now I have a kitchen which is literally 10 times SMALLER than the one I used to have (including not having a draw for cutlery or utensils), I utilised my jars to hold my cutlery and these are just three of a few I have on my kitchen window.  Below is a combination of Agee Jam Jars and an Old Special Agee Jar.


Another recycled use for my jars is making a toothbrush holder for the bathroom because there is very little space in that room as well.  I spray painted the lid black, just in case one didn't turn out quite right, and simply placed the toothbrushes and toothpaste in the jar.  This looked great, but after a little time of getting settled, little things started appearing on the bathroom counter, so I decided to place another jar to house those objects.  I'm not 100% sold on the second jar as I'd like to convert a couple of my old crown lynn plates into a tiered storage for effect, but for now the jar works perfectly.


Another use I thought was great was a soap dispenser.  I saw this on a website and thought I'd like to give that a go.  So after spray painting the lids black (to go with the toothbrush holder) and using the old soap dispenser pumps we had ... here we have it.  It's dead easy to make and I think it look great!!  I now have 3 in the house thanks for my beautiful husband helping me here :-)  


I also used alot of my jars at my recent house warming party as a vase to hold flowers as I was going for the rustic look.  I filled the bottom of the jars with sand and placed candles on top and hung them or rested them on the tables.  I placed fairy lights in the trees and dangled some jars from the trees with some of the fairy lights in them as well.  I'm just so disappointed I didn't get photo's of how it was set up as it looked absolutely fabulous.  In fact alot of people who turned up to the event thought we were throwing a secret wedding or renewing our marriage vowels :-) Hopefully some of my friends out there will lend me a couple so I can share the story of the house warming on another blog.


The possibilities are endless when it comes to these jars and you don't have to be limited on storage or preserving.  You could spray paint them and used them as decor in your house.  You can make a chandelier (yes I've seen it done and it looks great), serve individual desserts in them for your kids birthday party, or salads on the go.  You can serve cocktails out of them at your next cocktail party.  You can even use the jam jars as wine glasses.  I have ideas of using a couple of my jars as lights on the side of the chicken coop as well. I just have to convince my husband it's a great idea.  


If you any of the agee jars or any type of jar for that matter, use your imagination.  It could be your best feature and save you on stress and money.


Monday, April 9, 2012

Pickled Celery, Spring Onion & Chilli Salad

It's definitely been awhile since I took any photo's of food that I have created and during such a wonderful Easter weekend at home pottering about and enjoying myself, I decided to try something new for an unprompted dinner with friends and whanau who visited.


I love celery when it's fresh and crunchy, but some of my friends aren't too keen on it at all.  I remember as a child eating celery sticks with peanut butter for an afternoon snack after school.  Hmmmmmm the memories!!!


This is dead easy to make and tastes FAB-U-LICIOUS!!  As long as you have a full head of celery, you can pretty much add any other vegetables and condiments as you'd like. 


I used celery, spring onions and chilli, all of which were either in my vegetable garden or in my fridge. You pickle the celery by adding equal parts of salt and sugar to the finely chopped celery, then mix it all together and let it do it's thing for about 30 mins.  After that time, make sure to squeeze all the liquid out of the celery before adding it to the rest of your ingredients (which should be in another bowl).


I place chopped chilli (seeds and all), finely chopped spring onions, toasted sesame seeds, salt & pepper and the dressing with the pickled celery.

Dressing is simple.  White vinegar and sugar in a pot and reduce to 1/4, without stirring.  Let cool then add to salad and toss. 


It took 30 mins to make and about 5 mins to devour for dinner.


Saturday, April 7, 2012

Propagating From The Garden

There is something fulfilling about propagating from your garden because you are utilising what you already have.  All you need is some empty pots or trays, some descent potting mix, some hormone gel or powder to kick start the process and your favourite plants.

I have to be honest though.  When you live for 6 years in a dream home where the gardens are so low in maintenance that the most work needing your attention is trimming your buxus and corokia's every now and again, it takes a little time to find your rhythm again. In saying this, when you have 9 acres of potential, finding your rhythm for propagating comes flowing back in a flash.   Although it takes more time to get the results, it saves a truck load of cash.
Preparing for Propagating ... the glass of water was for me


This morning I planned to bake, however when our beloved chooks failed to produce any eggs, I set my mind on taking cuttings from the garden instead.  Just quietly, I think "the gals" were still a little traumatised from visiting children trying the chase them all night.


I'm a huge fan of mass planting because I think it gives structure to your garden so this morning I thought what do I need in mass.  Straight away, I thought lavender for a number of reasons - lavender brings bees and bees make honey (I plan to get my own hive in October).  Lavender smells delicious, and can be used in many home remedies including food.  I'd also like a beautiful low hedge of lavender - location yet to be confirmed but most of all, I have three smallish lavender plants situated in the front of our verandah and I know they won't live there for much longer.  So what better way to pay homage, than to propagate these 3 plants and spread their love all over the garden.


I also found a lovely row of corokia's behind the back shed or what I call "the outhouse".  These look fabulous as a hedge plus shelter the outhouse from the prevailing winds so I thought we could do with some more of those.

I'm also a fan of camellia's not only because they have beautiful flowers but because they are evergreen and in winter when all your summer and autumn colours have disappeared, your camellias take front row and centre and lift your garden.  I have a camellia that shelters the carport from the roadside and it's currently 5m x 6m so I'm guessing it's pretty old. I have no idea what type it is or even what colour it's blooms are as the buds are yet to give me any indication, but I have a sneaky suspicion they will be pink.  I have plans for a camellia hedge under the gum tree so they will be on my list as well.


Lastly, I have some beautiful old fashion roses.  I am was quite reluctant to take cuttings of these so early however my husband plans to demolish the garden they are currently in to make way for the kitchen/dining extension.  I plan to transplant them elsewhere to a special rose garden - location yet to be confirmed.


The afternoon proved very productive resulting in over 200 cuttings now resting nicely in the greenhouse.  Fingers crossed the return will be higher than 80% after 8-12 weeks.  


Finished Results


Our New Chooks

The funniest thing happened.  On Monday I came home from work and told my husband I had purchased 9 new additions to the whanau (family) off Trademe and they were arriving on Thursday night.  Yes that's right, 9 laying chickens were arriving and I had just upped my husbands stress levels by giving him 3 days to design and build the chicken coop.  Seemed like a doable project, and after trolling through the internet that night to give him some idea of what I wanted, it was very clear I didn't just want a chicken coop, I wanted the Taj Mahal.

We decided the best place to put the chickens was in "The Pines" - an area in the back paddock under the mature pines trees.  We figured it would give the "gals" plenty of space to scratch around.

We searched the internet and books high and low to find out what essentials chickens needed in order to accommodate my spontaneous purchase.  Nesting boxes (but not one for each chicken as they tend to share the same boxes), roosting area (much higher than the nesting boxes), small door with ramp so they are able to come and go as they please from the coop, lots of fresh saw dust to keep the coop nice and toasty at night, plus it makes it easier for us to clean the coop which is an added bonus, a little light to assist in the egg laying process, feeding process, watering station ... and the list goes on.


Tuesday night the design came home for me to view and Wednesday the build project began.  The floor, and two sides were up that night but unfortunately we ran out of light to continue after the sun had gone down.  Thursday my husband took the day off work and finished the build while I took half a day off work running around get wire mesh, tin, sawdust and not forgeting the kids from school.


6.30 pm came about and the roof and run still wasn't finished so I left my husband to carry on while I made my 30 minute ride to Ohaupo to pick up "the gals" with my daughter.  On the way home a sense of excitment hit me.  We had our first farm animals - chickens.  Chickens for fresh eggs ... YAY!!!


We got home and placed them carefully on their roosting perches in the band new, rustic coop, then went into the house to reflect on the last few days activities.  

What I got wasn't anything like the pictures I had seen on the internet, but knowing my husband's logic and eye for practicality in my eyes it was 100 times better than the Taj Mahal. I do envisage plantings of some sort to soften the area and provide additional shelter from any wind but I am happy with the outcome of my outrageous purchase.  Fresh free range eggs was this projects main objective and I'm excited about the outcome.  Next time I'll try to give my husband a little more warning!! 


THE CHICKEN COOP - TAJ MAHAL
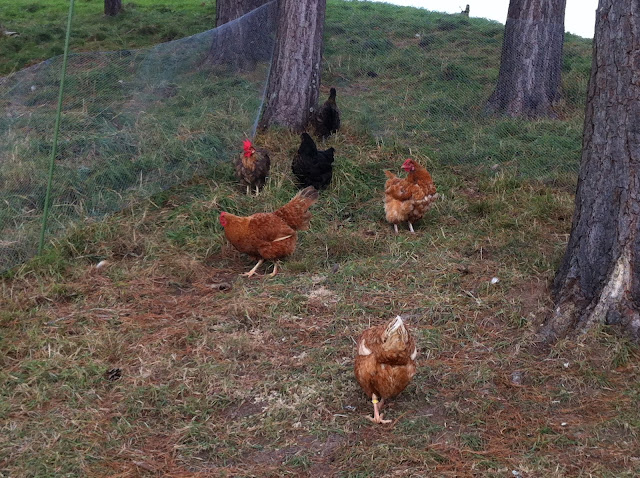
6 OF THE GALS
OUR VERY FIRST EGG


The Start Of A New Beginning

Today marks the beginning of a new practise in my life - blogging.  It's something that I have been thinking about for a very long time and it's only now that I have moved into a new home that it has come to fruition.  The new home that has been nicknamed  "The Ponderosa" because along with the grand old villa that was built in 1905, is 9 acres of absolute potential.  In fact it's that potential that has inspired me to capture every experience and share my learning's with whoever is keen to want to learn through this website. 


So a bit of background?  I've done the 1/4 acre property renovating a 1950's 70 m2 house extending it to 140 m2 of indoor/outdoor flow with tailored gardens containing roses, bays, fruit trees, lilies all sculptured with buxus hedging.  That was the first home project I entered into with my husband and two daughters and I must admit, it was an experience I learnt so much and was rewarded 100 times more than I ever thought I would with this home.


I have also done the 340 m2 two storey luxury build with double everything - showers, basins, ovens, fridges.  Wonderful indoor/outdoor flow, alfresco living, in ground salt water pool, fruit trees, vegetable gardens and all crammed into suburbia's 680 m2 section.  This was our 2nd project and a much different experience from the first and the rewards with this home was 1000 more than I had ever dreamt.


The Ponderosa offers a new type of life for me and my whanau or family and what I envisage is an opportunity to learn and live off the land without the dependence of the major supermarkets or commercial retailers who lack quality and flavour and have opted more for cheaper imitations riddled with chemicals, slave labour and no consideration for the environmental impact their quest to earn the mighty dollar has on the world.  


I hope to grow and live a much healthier and sustainable life but in saying that I don't claim to know everything or anything about achieving this outcome.  That is the new challenge - my new project.